KiCad 7.x Tutorial – Create A Project
Contents
Run KiCad 7.x App
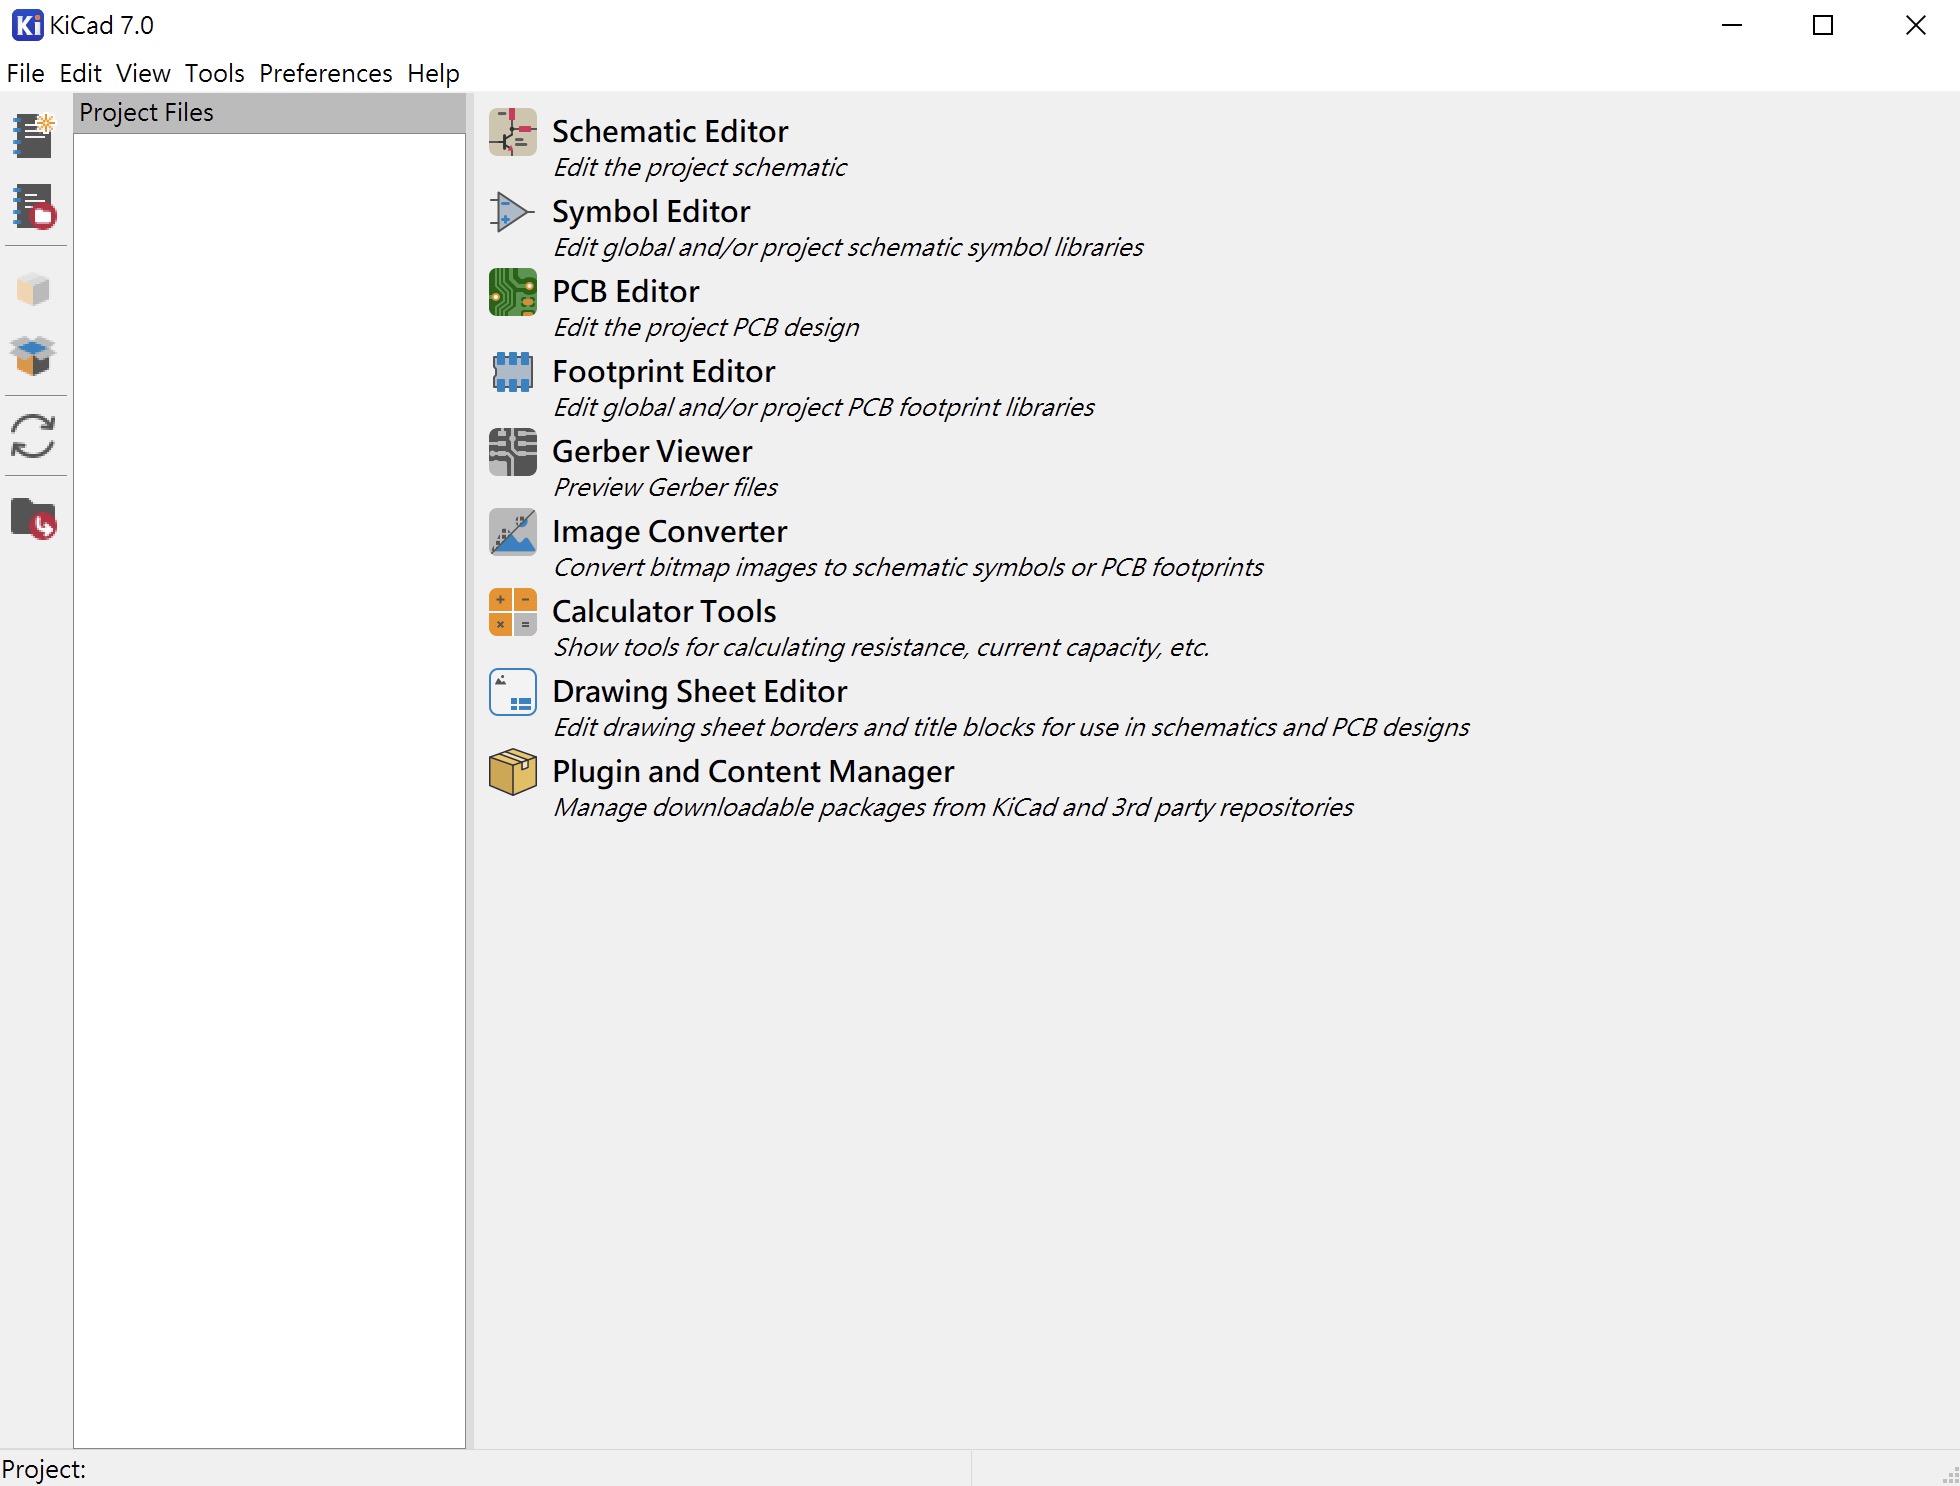
When we start designing in KiCad, the first thing we do is create a new project. When you open the KiCad application you will see the following screen.
Create A KiCad Project
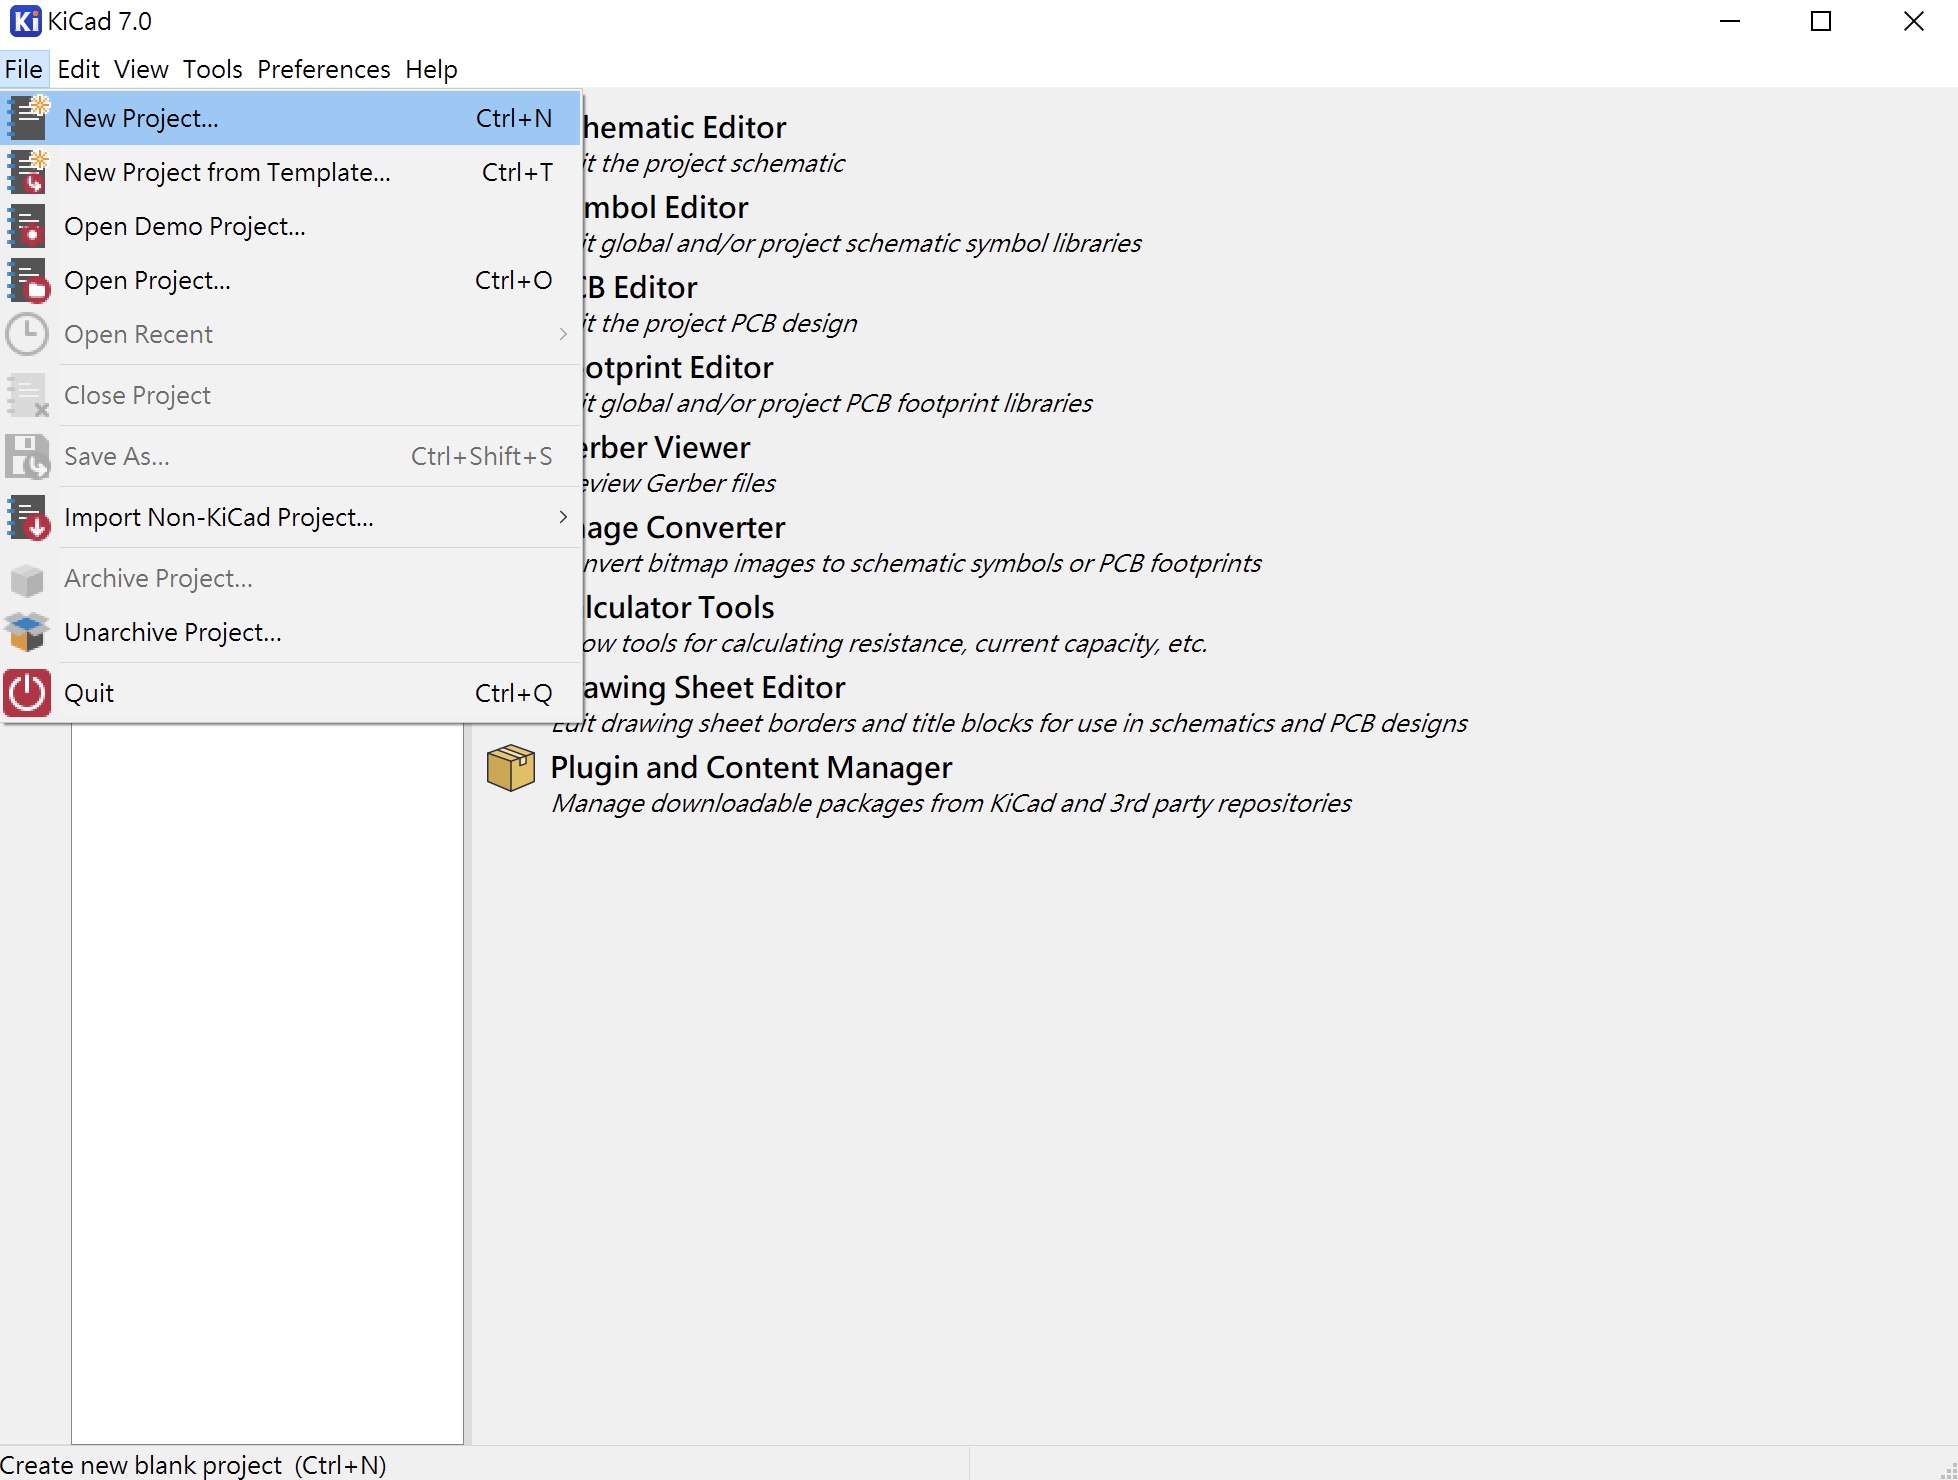
First click File ▷ New Project...
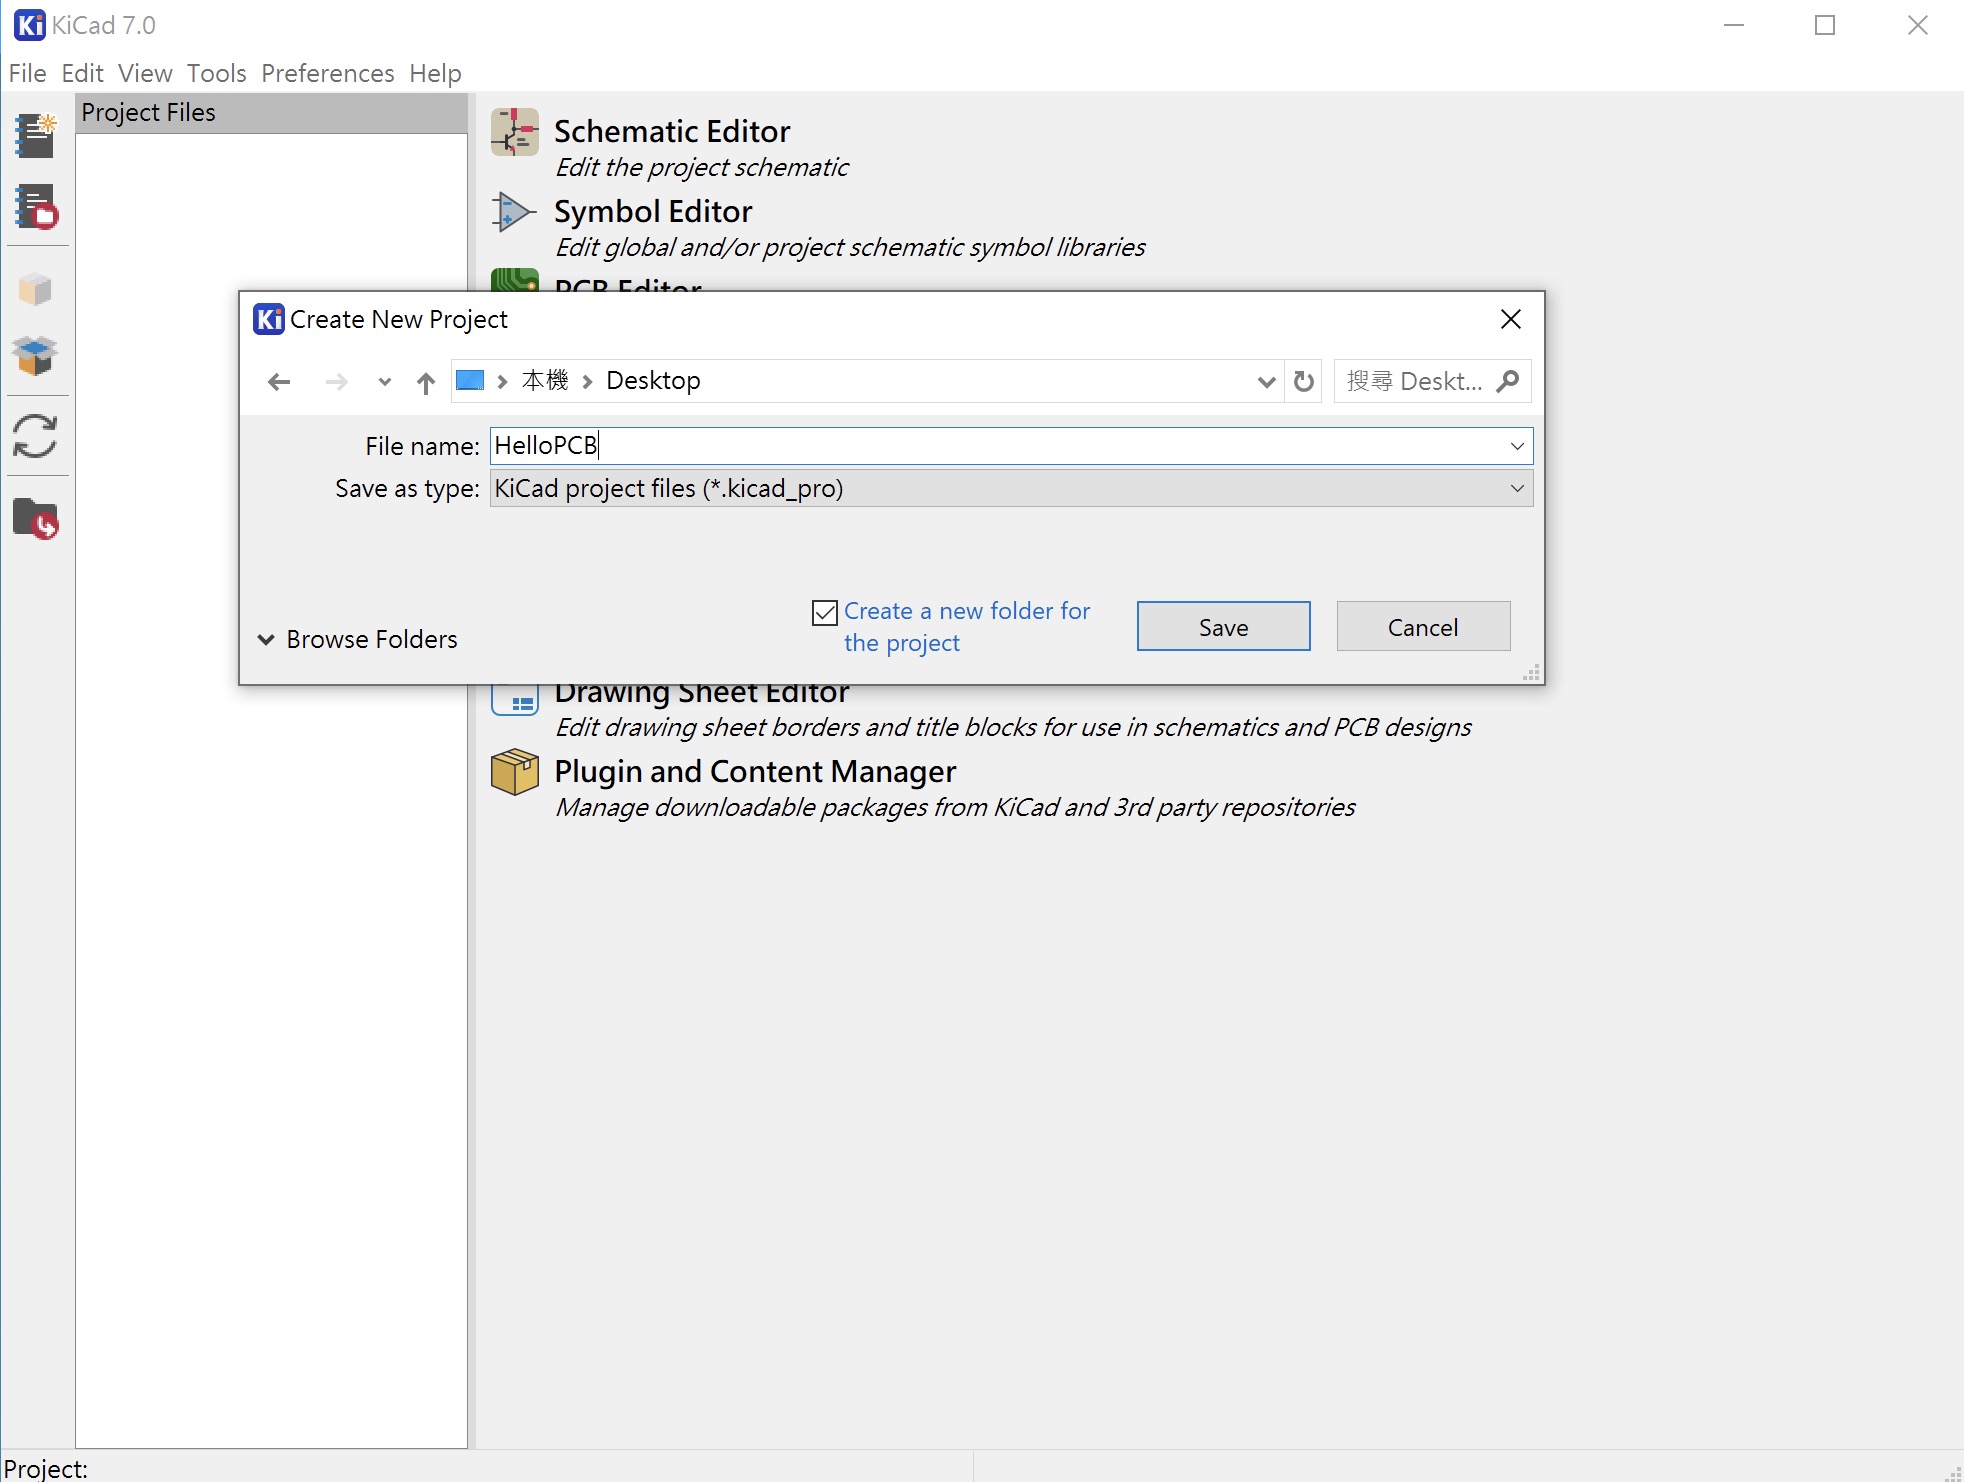
Browse to the location you want and give the project a name, such as HelloPCB.kicad_pro.
After clicking "Save", you will see the new project file, as shown below...
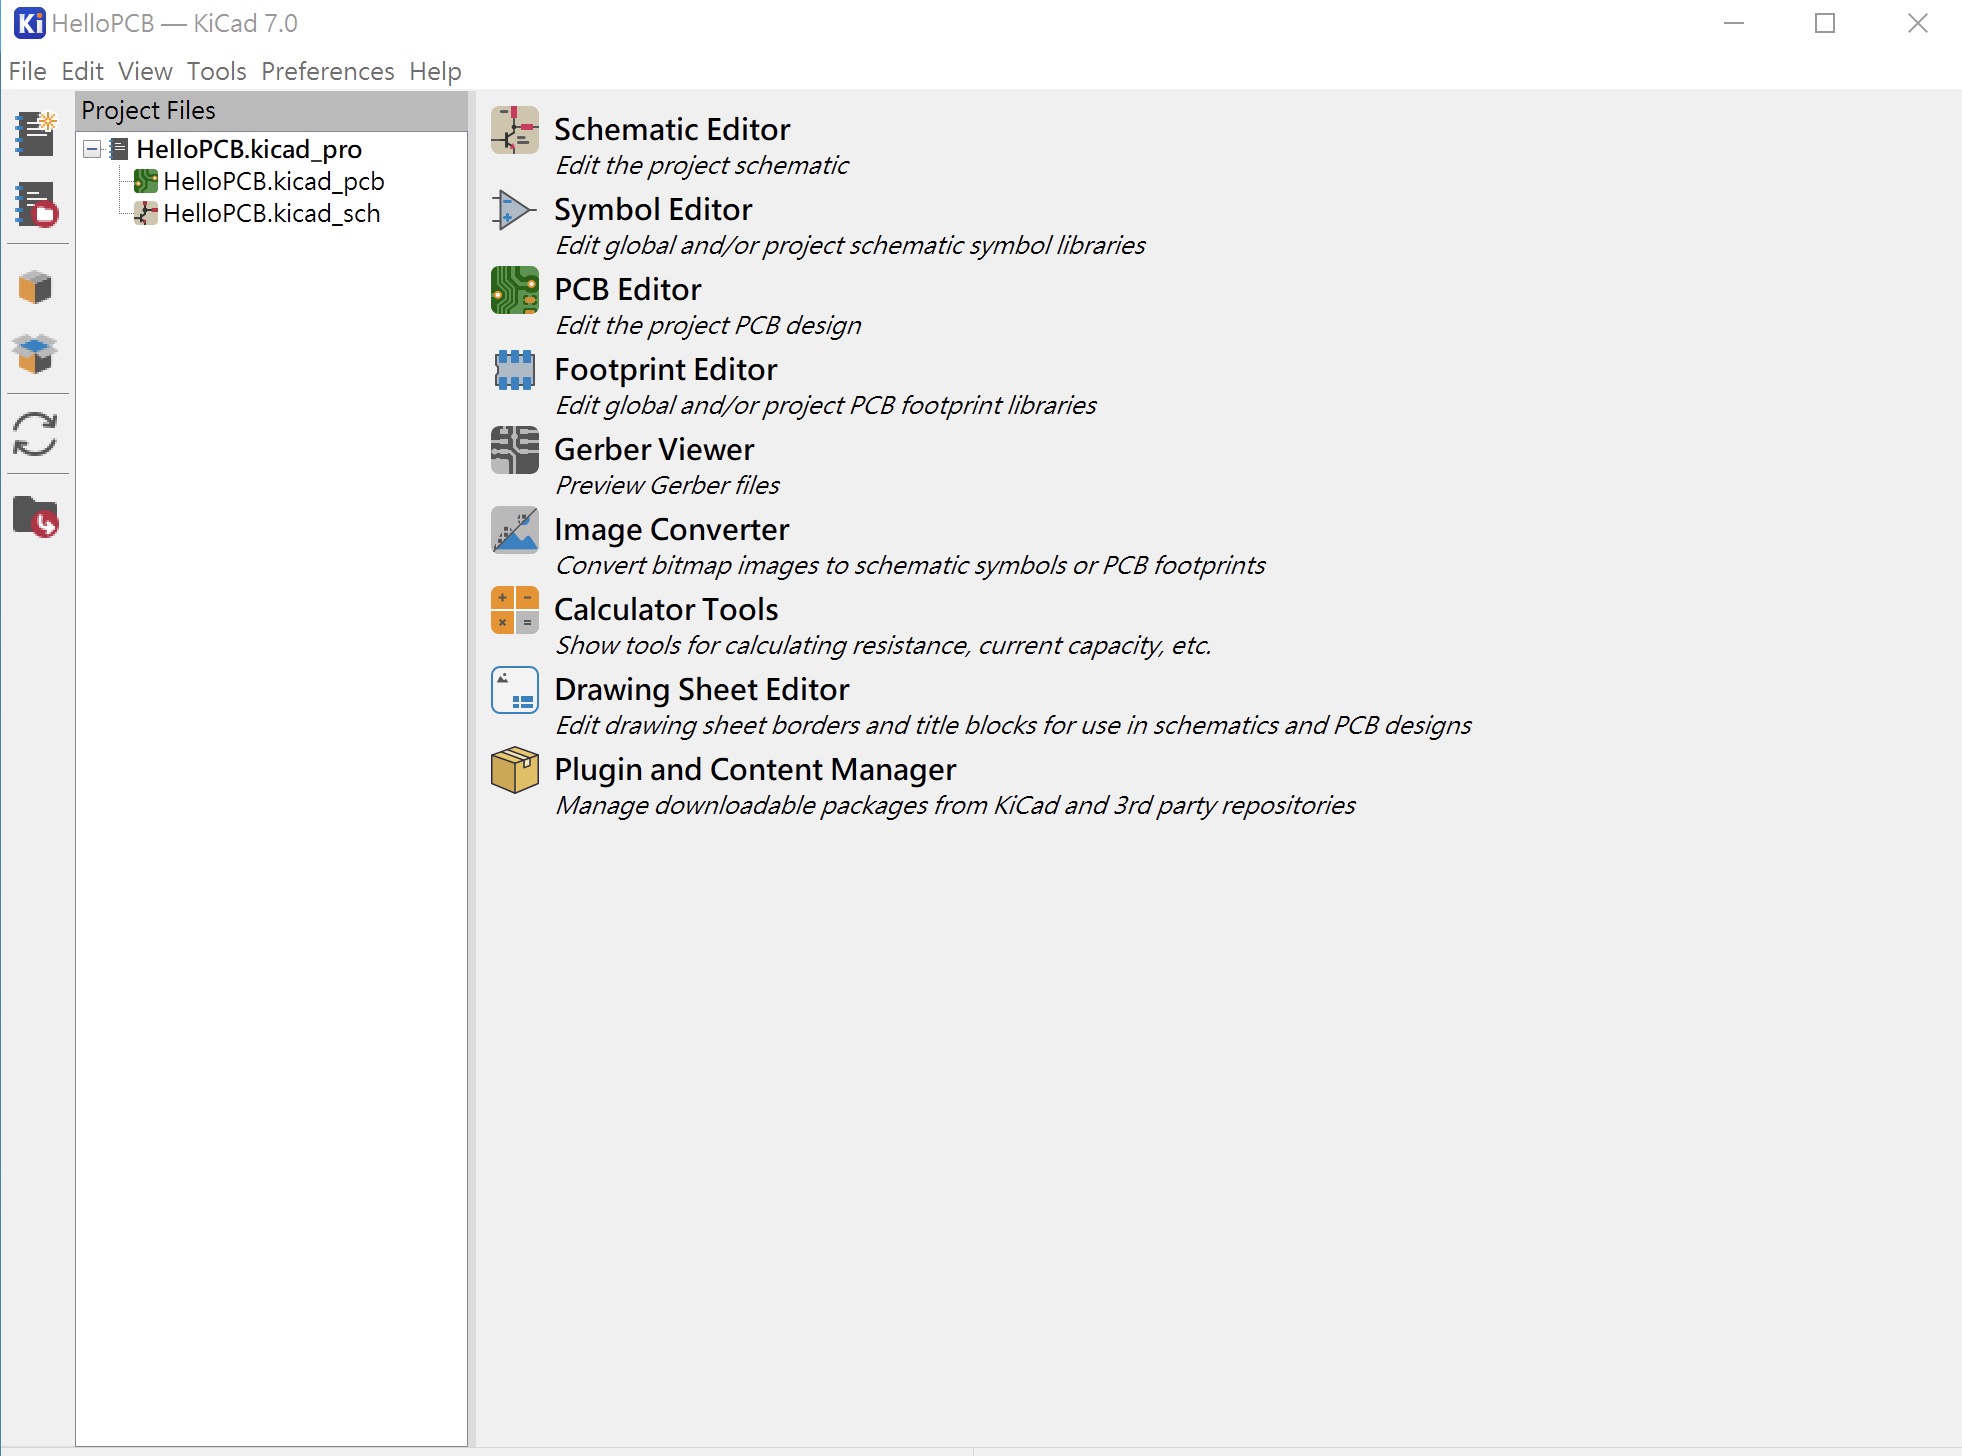
KiCad Project Files
*.kicad_pro: A project file

*.kicad_sch: A schematic file

*.kicad_pcb: A PCB file
Setting KiCad Project Backup
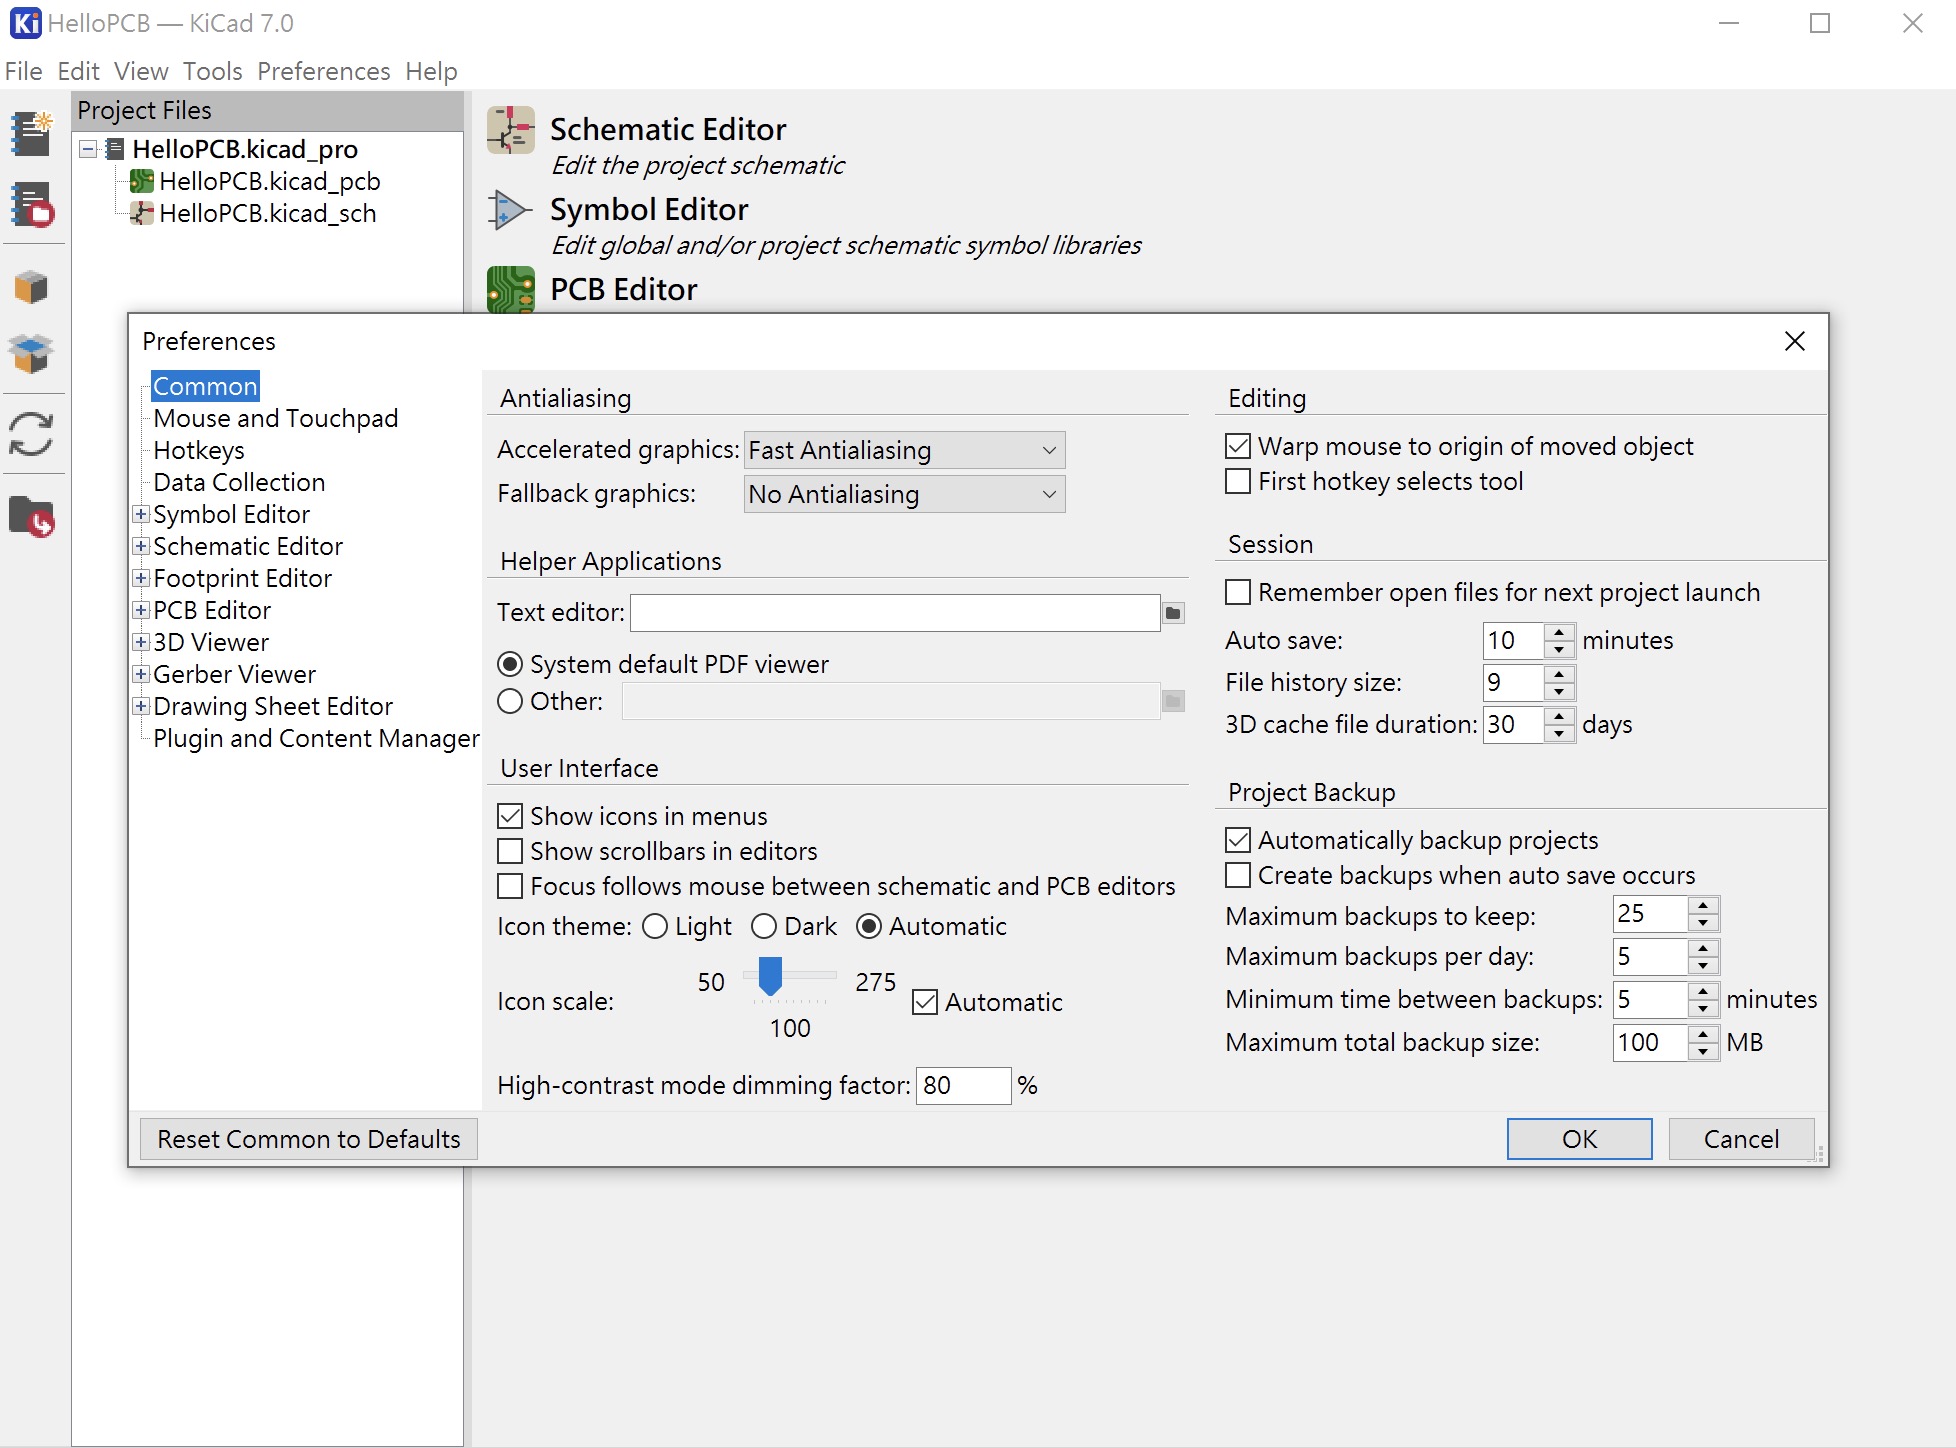
KiCad automatically backs up your projects and there is an option to set the backup interval.
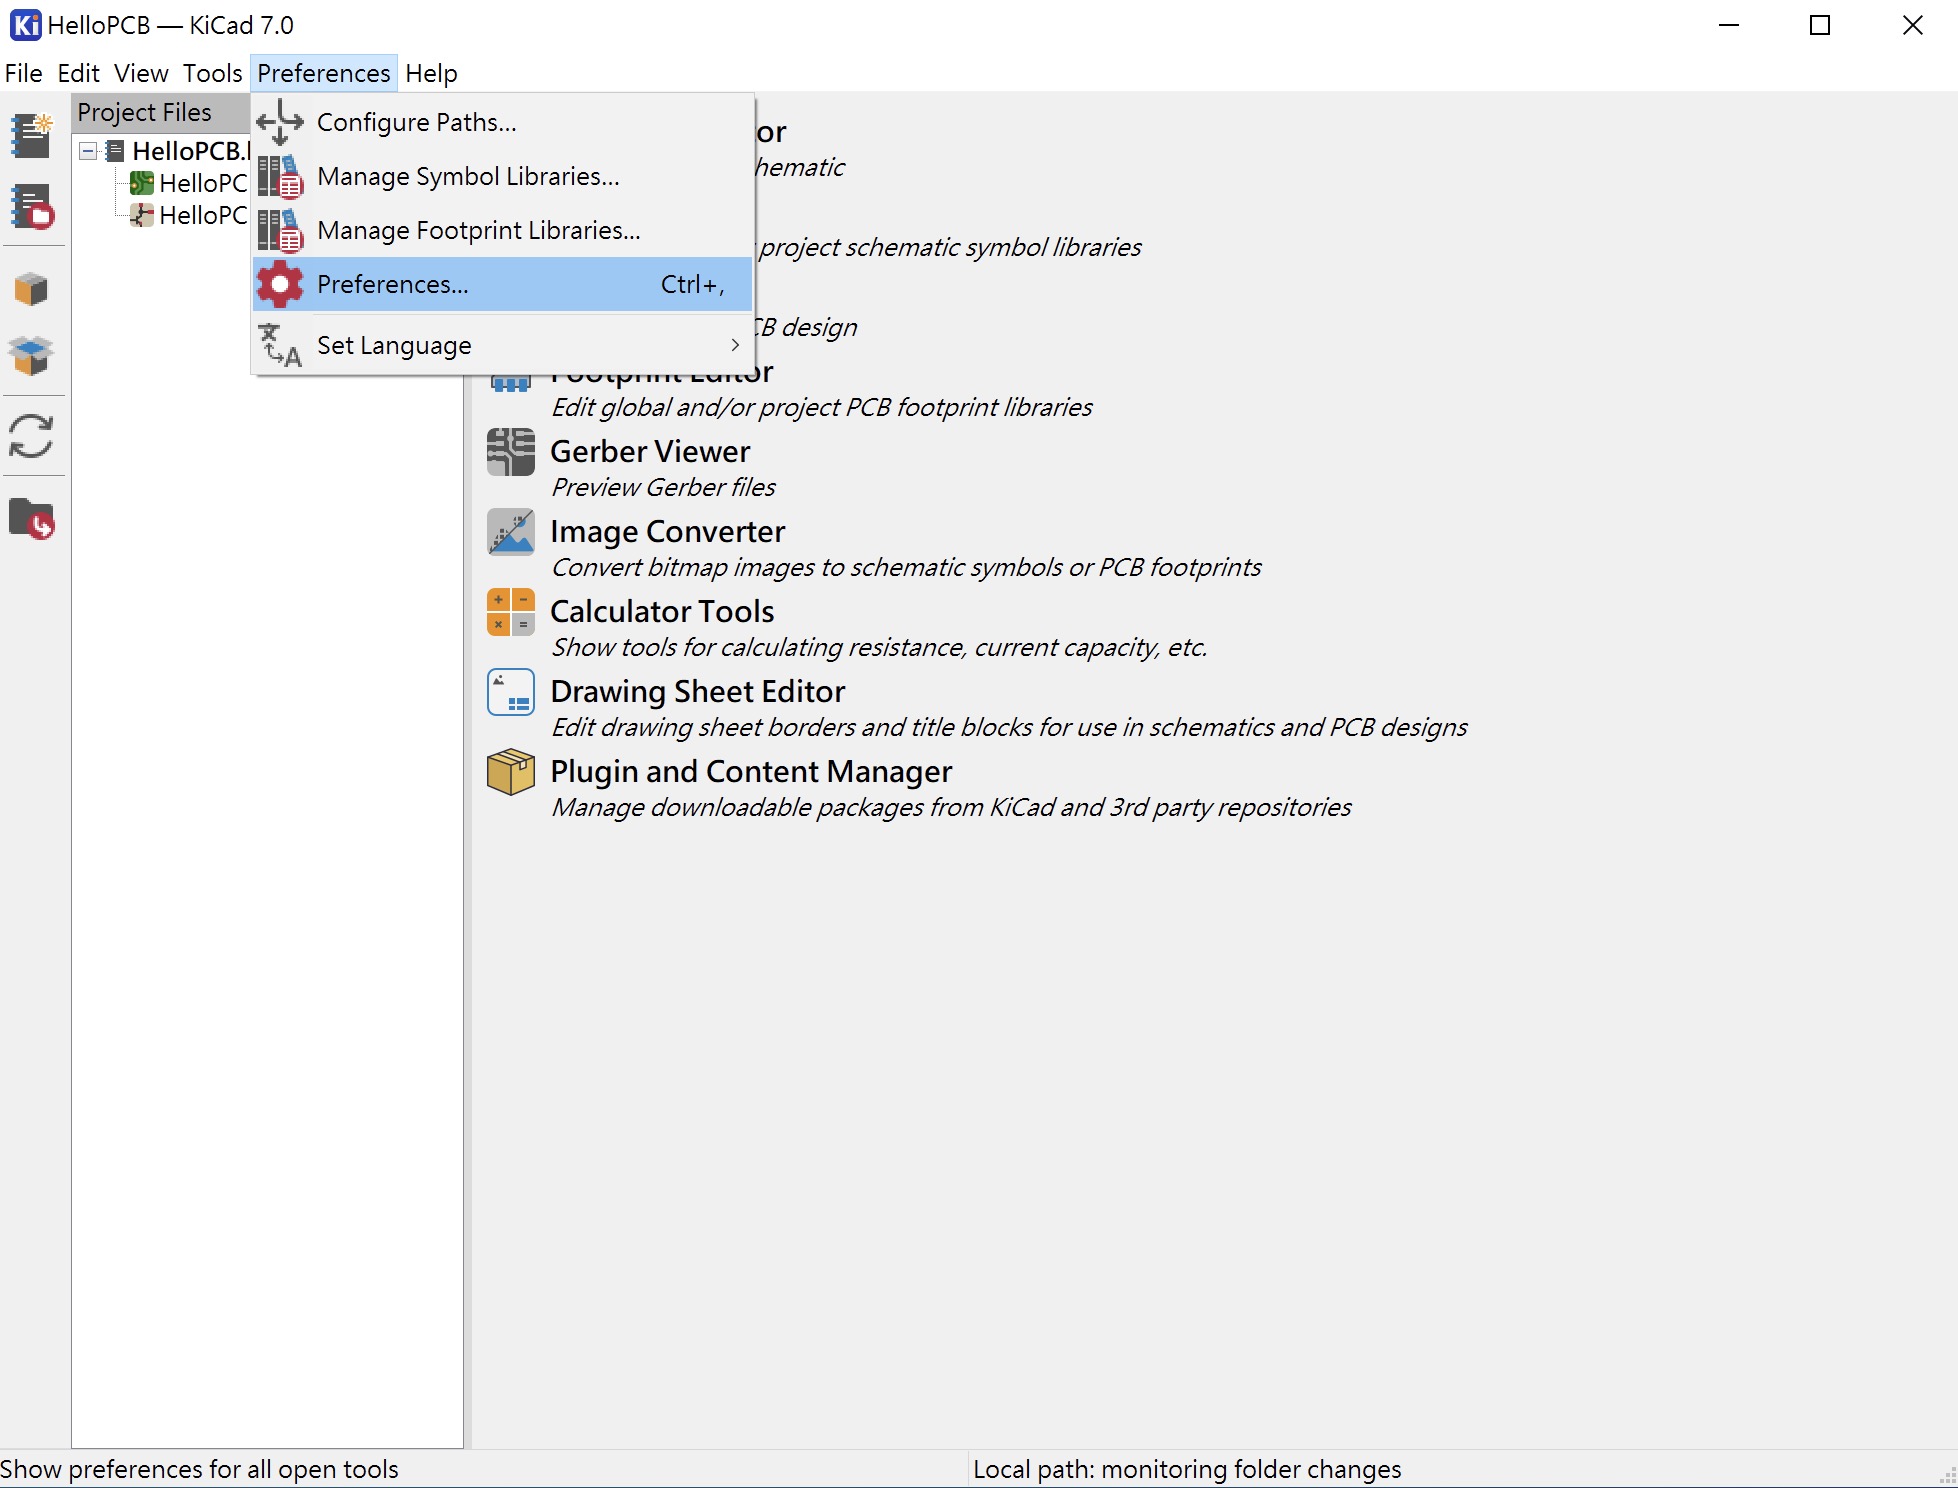
Select "Preferences ▷ Preferences..." as shown.
Select Common ▷ Project Backup to make relevant settings.
Conclusion
These are the basic steps for creating a new project in KiCad. After completing these steps, you can start designing your circuit board.

